Update: This lsystem/Structure Synth code has now (March 2016) been incorporated into the Sverchok Generative Art node. See the updated examples and the node docs
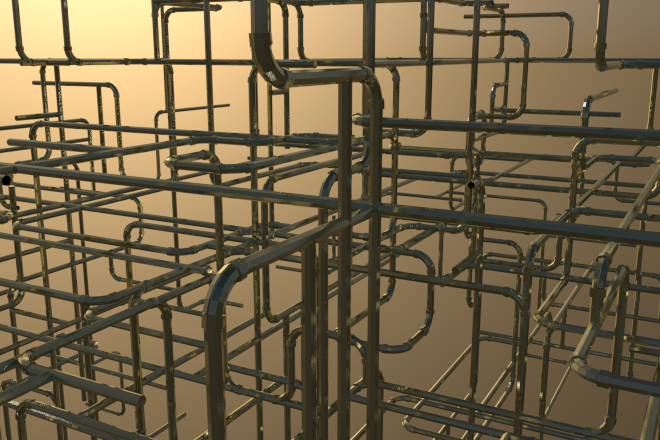
The old windows 3D pipes screensaver has inspired many pipe generators for different graphic packages. There's even a physical version on thingiverse. But there dosen't seem to be anything similar for Blender past version 2.49.
Here's how to make one using the Generative Art node in Sverchok. This node is now available under Beta nodes in the latest version of Sverchok available on github. Download the zip version and install like any other Blender addon.
The documentation for the node is here. See also previous posts on this blog tagged sverchok.
First of all you need to set up two basic elements a straight section and a bend. The straight section needs to go from (-0.5, 0, 0) to (0.5, 0, 0). Basically a cylinder of length 1, centered at the origin and aligned along the x-axis. The bend needs to go from (1, 0, 0) to (0, 1, 0) and have its origin at (0, 0, 0). Easiest is to start with a torus with a major radius of 1 centered at the origin, then delete 3/4 of the faces leaving only those in the positive x-y quadrant.
Examples of straights and bends.
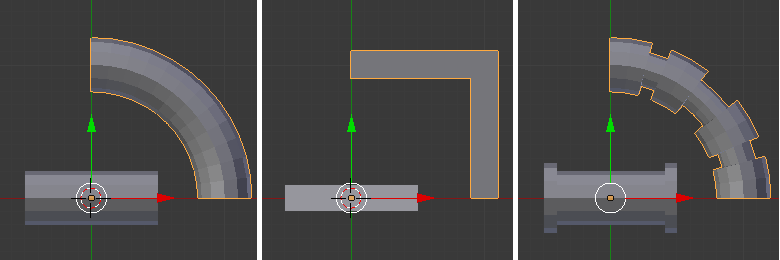
Make sure any scaling done in object mode is applied (CTRL-A) to the object. Keep the number of vertices around the ends of the two elements the same for a smooth look. This will also enable the meshes to be nicely joined later if desired.
The following xml defines seven versions of the "R1" rule. The versions have each been labeled with the attribute "dir" to help figure out what they do. This attribute is ignored by the "Generative Art" node processor. The "straight" rule places the "s1" shape and the others place the "s2" shape.
<rules max_depth="50">
    <rule name="entry">
        <call count="4" transforms="rz 90" rule="R1"/>
    </rule>
    <rule name="R1" weight="200" dir="straight">
        <instance transforms="tx 0.5" shape="s1"/>
        <call transforms="tx 0.5" rule="R1"/>
    </rule>

    <rule name="R1" weight="10" dir="left">
        <instance transforms="ty -1" shape="s2"/>
        <call transforms="tx 1 rz -90" rule="R1"/>
    </rule>

    <rule name="R1" weight="10" dir="right">
        <instance transforms="rz -90 tx -1" shape="s2"/>
        <call transforms="ty 1 rz 180" rule="R1"/>
    </rule>

    <rule name="R1" weight="10" dir="up">
        <instance transforms="tz 1 rx -90" shape="s2"/>
        <call transforms="tx 1 rz -90" rule="R1"/>
    </rule>

    <rule name="R1" weight="10" dir="down">
        <instance transforms="tz -1 rx 90" shape="s2"/>
        <call transforms="tx 1 rz -90" rule="R1"/>
    </rule>

    <rule name="R1" weight="20" dir="branch">
        <call rule="R1"/>
        <call transforms="rz 90" rule="R1"/>
    </rule>

    <rule name="R1" weight="1" dir="180 double bend">
        <instance transforms="tz -1 rx 90" shape="s2"/>
        <instance transforms="rz -90" shape="s2"/>
        <call transforms="tx 1 rz -90" rule="R1"/>
    </rule>

</rules>
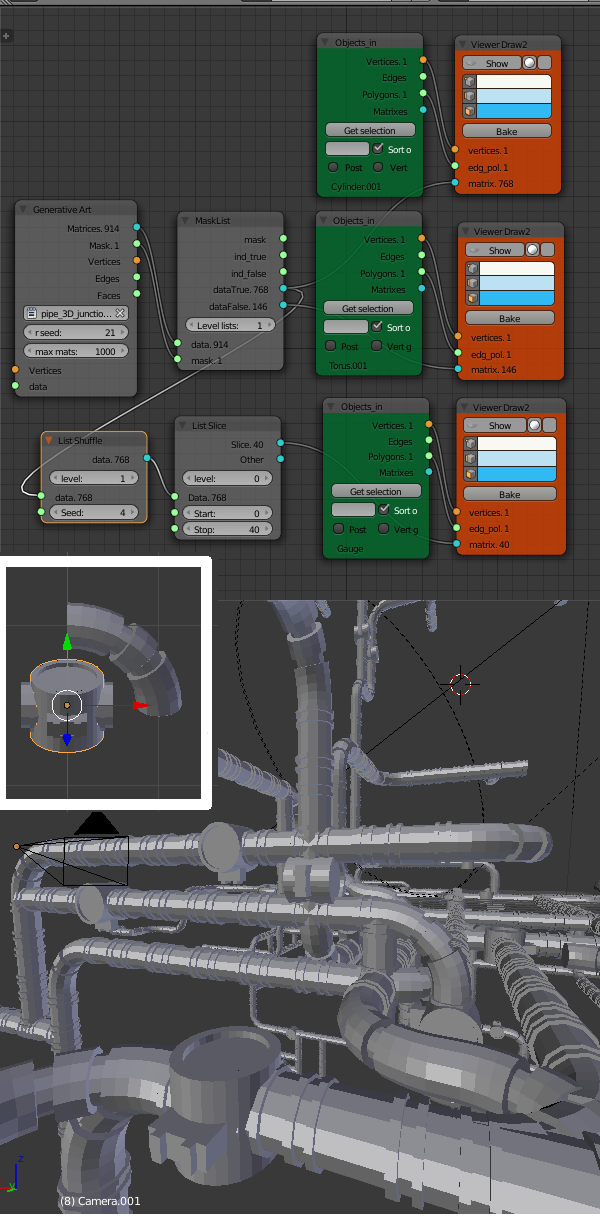
Paste the xml code into a text block in the blend file and set up a Sverchok node diagram as follows. Use the drop down on the "Generative Art" node to select the text block with the xml code. Select the straight object in the scene and use the "Get selection" button on one of the "Object In" nodes to import it into the node. Import the bend object into the other node. After doing this you may have to swap the objects over to get the pipe structure to connect up properly.
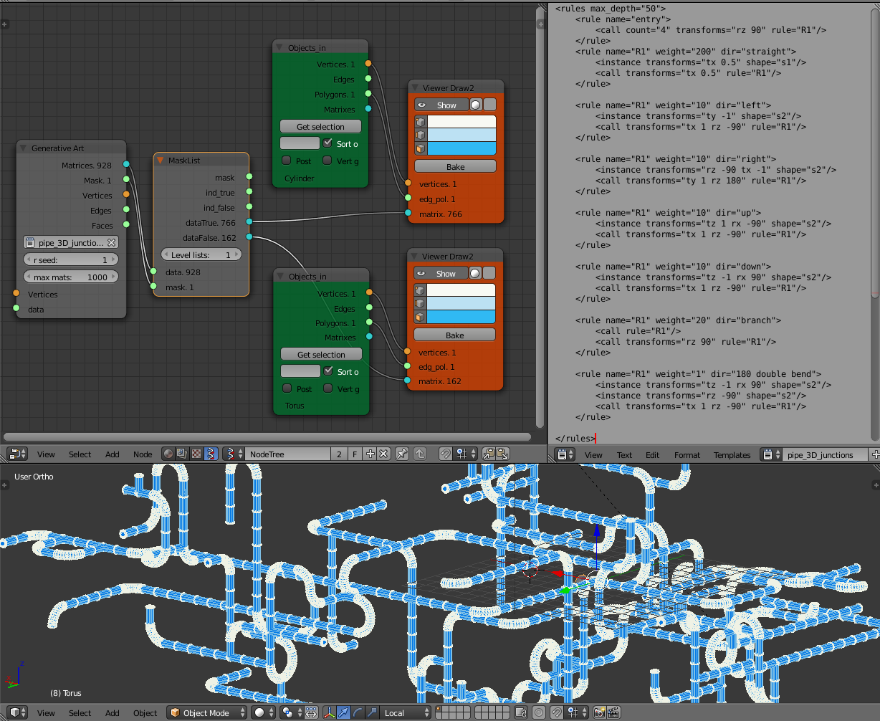
Once everything is working, play with the weights associated with each rule. This will change the structure of the pipe network. Changing the rseed value on the node will also change the random basis of the structure.
After changing the xml file in the text editor, the Sverchok nodes can be updated with CTRL-ENTER.
Decorations can be added to the network at random. First model the decorators keeping the origin for each object at (0, 0, 0). Then use the "List Shuffle" and "List Slice" nodes to select a small selection of the original matrices. Use these matrices to place the decorator objects.