While playing around texturing the hyperbolic football from the previous post I discovered this technique for painting hyperbolic tilings directly in Blender.
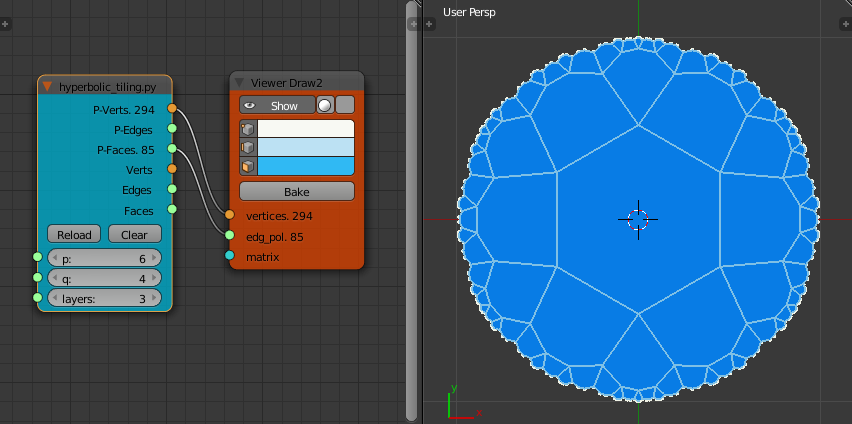
Download the hyperbolic_tiling.py scripted node for Sverchok. If you need help installing Sverchok or using a scripted node see the first post on hyperbolic planes. Connect it up as shown below. The tiling above has p = 6, q = 4, layers = 3.
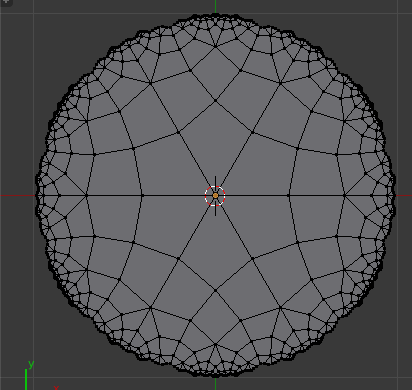
Use the top set of outputs to give a flat plane tiled with hexagons. Bake this mesh. Then apply a "Subdivision Surface" modifier with 1 subdivision. This gives a surface tiled with quads. Alternatively you could use "Poke Faces" to divide each face into triangles or use both together.
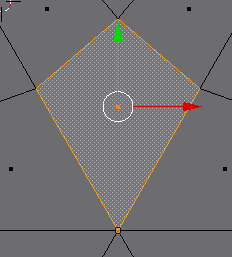
Take a screenshot of the mesh and crop to show one of the central faces. Save this file as for example "kite_tile.png"
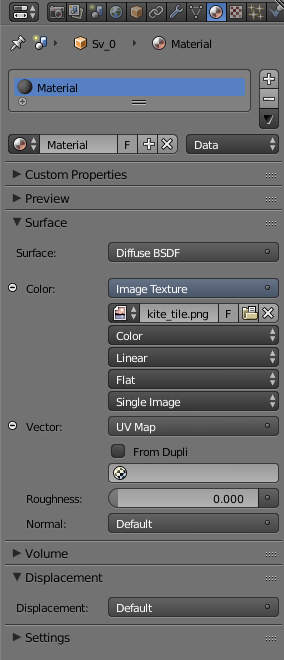
Apply a new (cycles) material to the surface and under color select "Image Texture" and set to the "kite_tile.png" image of the single face. Set the "Vector" parameter to "UV Map".
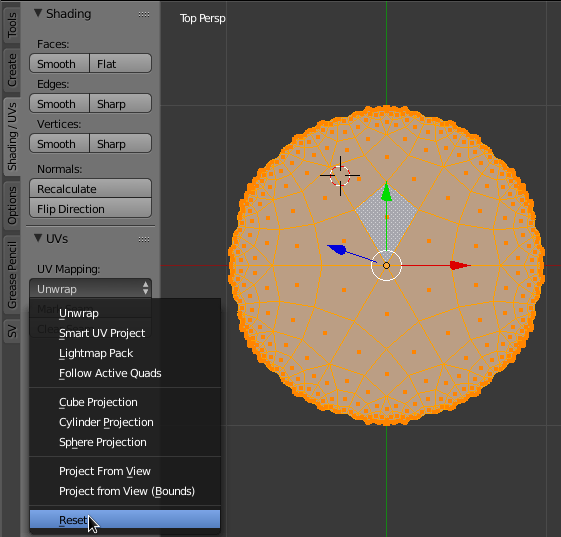
In edit mode, select the whole mesh (A) and UV unwrap (U) the mesh selecting the "Reset" option.
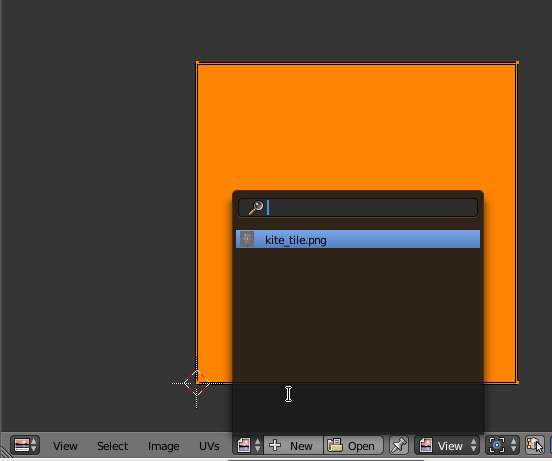
In a "UV/image Editor" view, all the faces in the tiling should have been mapped on top of each other to show one orange square. Link the "kite_tile.png" image to display it behind the faces.
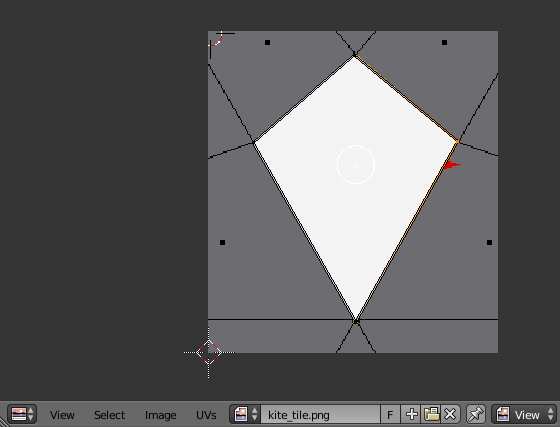
Scale the faces to show the tile.

We now need to move the corners of the square in the UV editor to match the corners of the kite shape in our image. Use the B key to box select each corner in turn and move it to a corner of the kite shape.
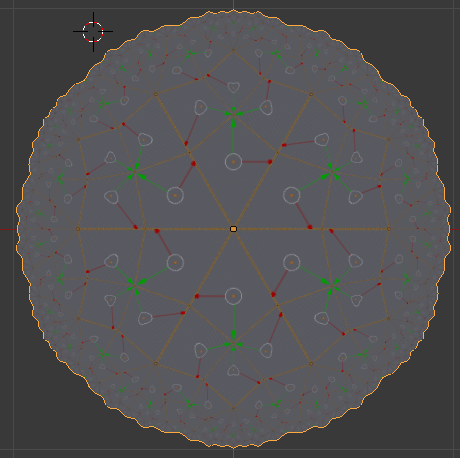
In the 3D View set the display mode to "Texture" to check we have moved the right vertex of our square the right vertex of the kite. If correct the red and green arrows in the kite image should be nicely tiled across the plane.
Now we can use any image we like to tile the Poincaré plane by simply exchanging it for "kite_tile.png" or we can draw on the image directly in Blender.
To do this swap to the "Paint" editing context in the "UV/image Editor", use the T key to pull up the paint tool-bar and start drawing.
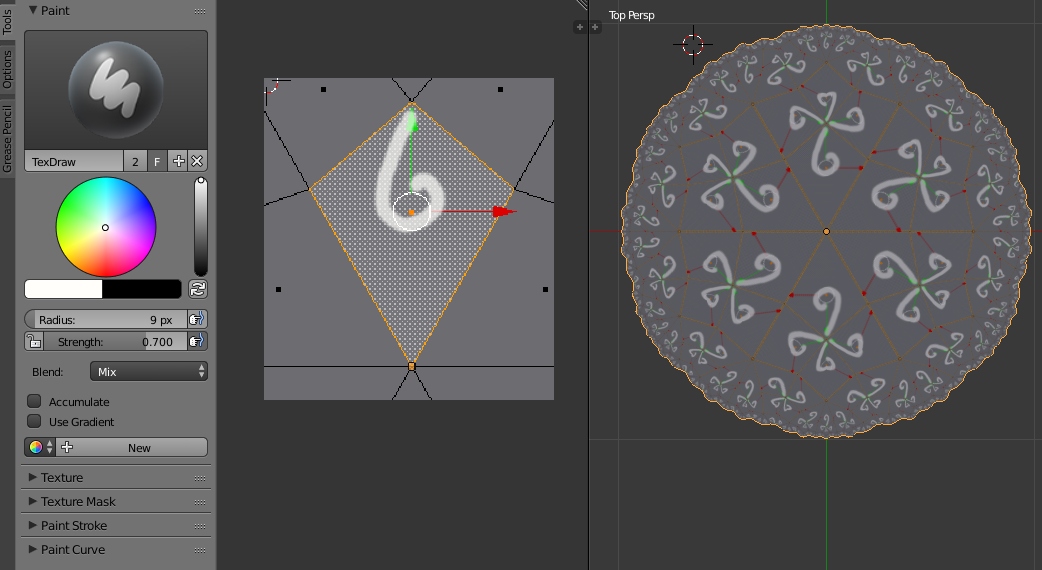
The "3D View" will update in real time with the painting strokes in the "UV/image Editor". The range of paint tools isn't as wide as in GIMP but there are plenty of options to play with. Make sure to either save the image before exiting ("Image" menu -> "UV/image Editor") or pack it into the Blender file (("Image" menu -> "Pack as ...") as otherwise changes to the image will be lost when you exit Blender.
The tilings produced this way are only approximately hyperbolic as Blender dosen't use a hyperbolic mapping to squash the pattern on to the tiles as they get smaller and smaller. There is other software that does this properly (online images here or python software here but I was amused to find a way to do this approximation completely in Blender.
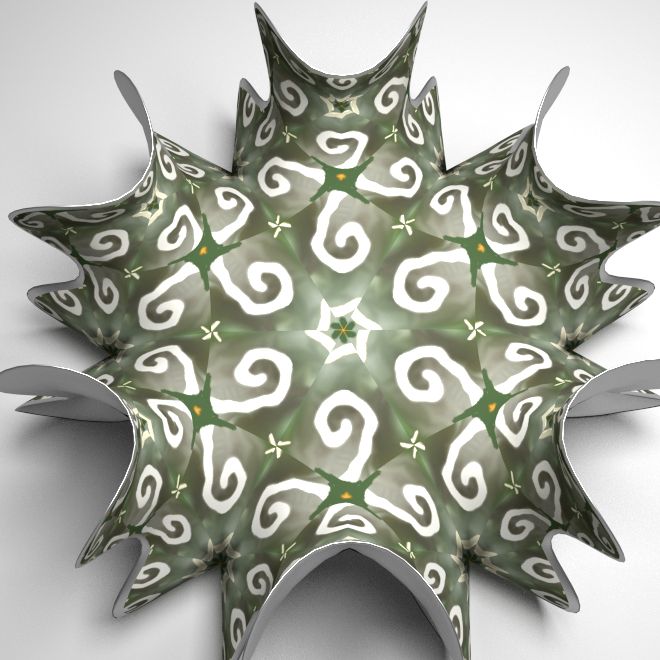
Of course this texturing technique can be used equally as well on the unfurled 3D versions of the tilings
Other Hyperbolic software to look at:
- HyperPlay Online Javascript, also avaliable for download on github.
- Hyperbolic Tessellations Applet Online Java Applet
- KaleidoTile Win, Mac, The older GL1 version works on Linux under Wine. C source code available with GPL license.