Hyperbolic Planes
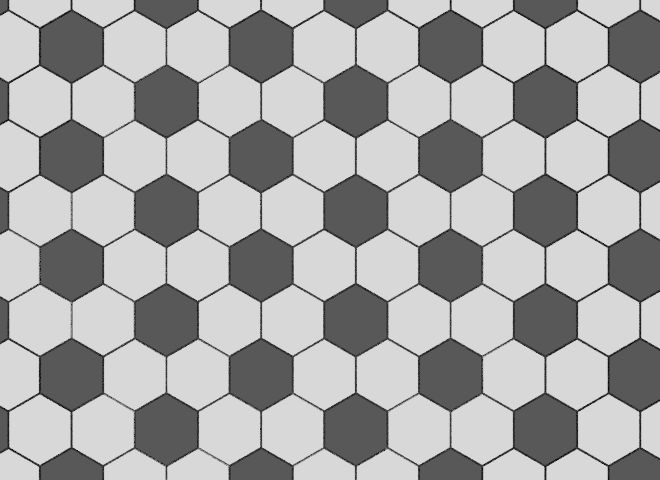
If you cut out a large number of paper hexagons, you can arrange 6 hexagons around a central hexagon and form a honeycomb tiling of the plane. The plane has zero curvature. Its flat. Any triangle you draw on this plane has angles that add up to 180 degrees
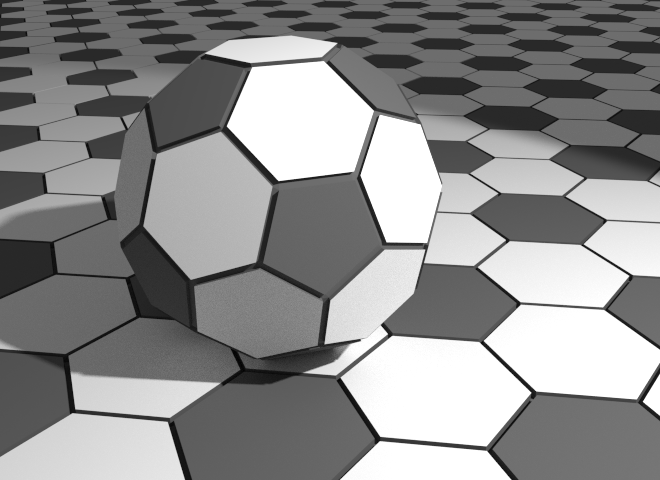
If you also cut pentagons from paper with the same side length as the hexagons and this time arrange five hexagons around each pentagon (using some tape to hold it all together) you will get a sphere patterned like a soccer ball. The sphere has constant positive curvature. If you draw a triangle on a sphere the sum of its angles will always add up to more than 180 degrees. How much more depends on the area of the triangle as a portion of the area of the sphere. For example a triangle drawn through the pole and two points on the equator can have three 90 degree angles.
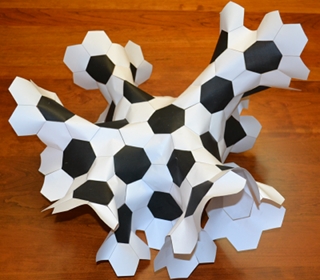
If instead of pentagons you use a seven sided polygon (septagon) for the central polygon you will get a nice crinkly surface. (Instructions) This is said to have constant negative curvature and is an example of a hyperbolic plane. The sum of the angles for a triangle drawn on a hyperbolic plane will always be less than 180 degrees.
Another way to make a physical model of a hyperbolic plane is with crochet. Dania Taimina, a Latvian mathematician developed this and has a book with the great title Crocheting Adventures with Hyperbolic Planes. This has inspired many projects world wide including this crochet coral reef.
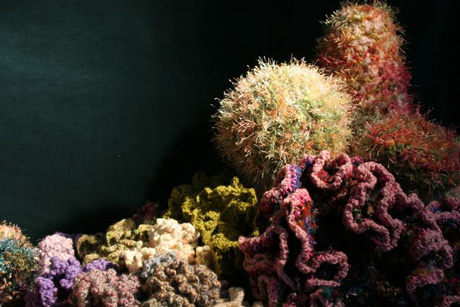
"Crochet Coral and Anemone Garden" with sea slug by Marianne Midelburg. Photos © The IFF by Alyssa Gorelick.
Lots of surfaces in nature have this crinkly negative curvature. It maximizes surface area in a given volume. Which is great for marine organisms that feed by filtering water, but is also seen in some cacti, succulents, fungi, lichens, lettuce and kale.
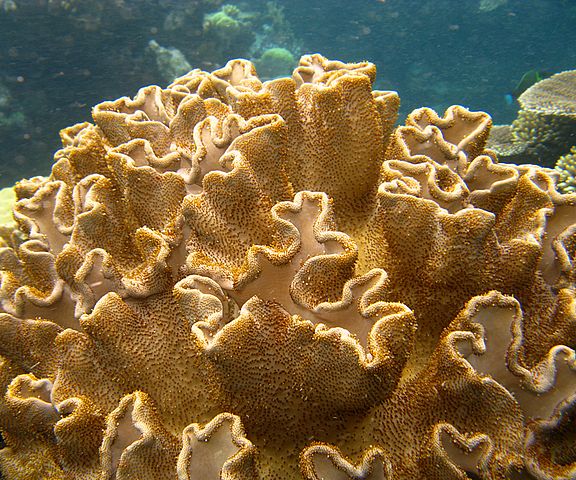
"Folded Coral Flynn Reef" by Toby Hudson - Own work. Licensed under CC BY-SA 3.0 via Wikimedia Commons.
Blender
I got interested in trying to make 3D meshes with this type of hyperbolic geometry.
A web search found this online app written in Processing. Its further explained in this blog entry.
To translate the system to Processing we needed two conceptual parts - a constructor to build relationships between stitches and a physics simulator to give material properties allowing the stitches to self optimise their position (ruffle).
Essentially the stitches are replaced with particles connected by springs. The particles are free to move and the springs can be compressed or stretched but have a rest length that they try to reach. The system comes to equilibrium when as many springs are as close as possible to their rest length - a condition that requires a resolved hyperbolic form.
To me, the use of springs looked a bit like the cloth modifier in Blender so I wrote a Sverchok scripted node to generate the hyperbolic geometry. Sverchok is great for this kind of exercise as it seperates out generating the geometry from all the other Blender python stuff. With a Sverchok node all you need to bother with are lists of vertices, edges and faces.
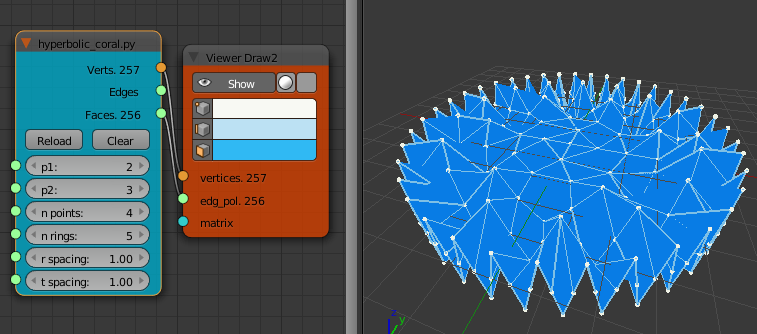
To use the hyperbolic coral node in Blender first install the Sverchok addon. Download the hyperbolic coral code from github. Then load the python file as a text blocks into a blend file. Add a "Scripted Node" to a Sverchok node tree. On the node select the hyperbolic_coral.py code from the lower drop down. Then click the plugin icon to the right of this field. The node should turn blue with some inputs and outputs. Wire the "Verts" and "Faces" outputs to a "Viewer Draw" node and you should see some geometry as below.
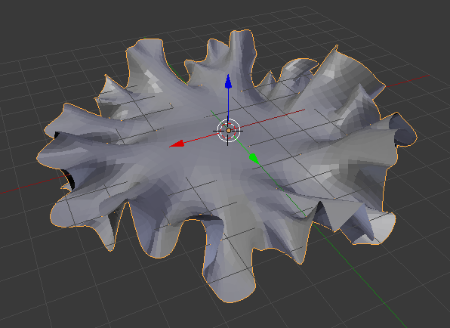
To make this more coral like we use the cloth modifier to wrinkle and deform the mesh.
Bake the output of the "Viewer Draw" node. (select the node and find the "bake" button on the N-panel (Properties shelf) . Click the "Show" button to disable the node and see the object with a name such as "Sv_0".
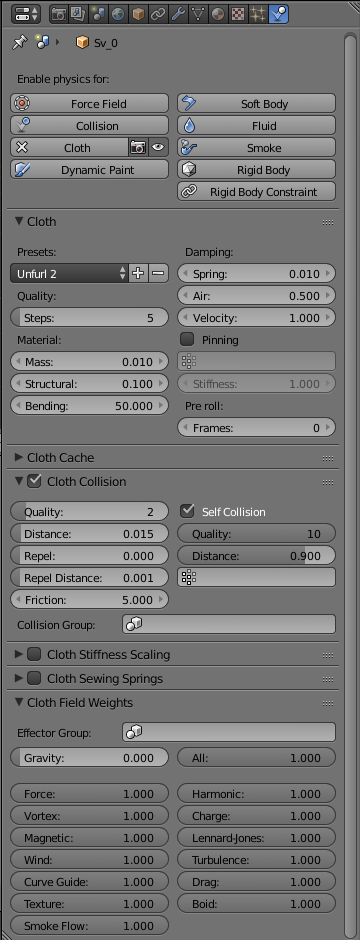
Go to the Physics tab and enable cloth physics. To the right is a reasonable set of parameters. The most important is to select "Self Collision" under "Cloth Collision" and to set a reasonably high "Quality" for this.
If you are not pinning parts of the mesh (see below) you may want to turn "Gravity" off under "Cloth Field Weights" or the mesh may just fall of the screen when you run the cloth simulation.
Add a "Subdivision Surface" modifier after the "Cloth Modifier". Then run the simulation by starting the animation (Alt-A). Stop the animation when you like the shape and apply the modifiers to bake the mesh.
To get more shape to the surface, subdivide it before applying the cloth modifier. This will slow down the animation process.
To give some structure pin some of the vertices of the mesh. For example select a ring of vertices near the center of the mesh and create a vertex group. Select pinning on the physics cloth tab and select the vertex group just below this. Turn gravity back on. and possibly increase the "Mass" of the cloth to say 0.1. When the cloth simulation is run, These vertices will be pinned in place and the outer edge of the mesh will drape under gravity. After applying the cloth modifier turn the object over so the drapes now go upwards.
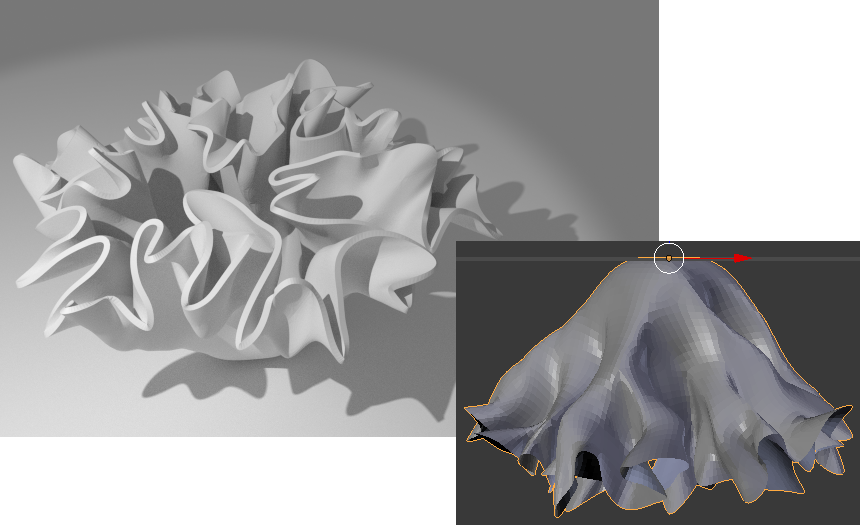
All the objects in the top image were created from hyperbolic planes made from this node.
The six parameters in the node change the structure of the surface. Fiddle with them until you get something with the amount of ruffle you like.
"p1" and "p2" give the number of increases in each ring. For example "p1 = 2" and "p2 = 3" means that the vertices in a ring will alternate having 2 edges going to the next ring and 3 edges going to the next largest ring.
"n points" gives the number of points in the first ring.
"n rings" gives the number of ever larger rings.
"r spacing" gives the radial distance between the rings.
"t spacing: gives the spacing between vertices in the same ring.