Last month I went to a talk at our local library by Mark Gee on astrophotography, and I got hooked inspired.
For my real job I work on really expensive optics for some of the big telescopes. I also did a few astronomy papers way back. Both of these made me think I'd be a bit disappointed with any astro photos I could take with stuff I could afford to buy for myself.
The equipment for wide field shots of the Milky Way looked much more in the birthday present to self price range and Mark Gee and other's results look spectacular.
So I went online shopping for a DSLR camera and lenses. I chose a Canon (brand loyalty) 700D (last year's model is usually good value, who needs wifi for stars). I paired this with Samyang F2.8/14mm wide angle lens which seemed to be many people's favourite for wide field astrophotography. Searching flickr for camera type and "milky way" showed other people getting good results with this combination.
On a recent trip to Queenstown I got a chance to try all this out. There the sky is darker than locally. For my first attempt I just went down to the local park, but I could of got to some real dark sky with half an hour's drive.
Mars and Saturn where in Scorpius which was rising over the Remarkables.
I took a series of shots at F2.8, ISO 6400, Shutter speed 13 s (faster than this gave star trails) in RAW format. I was a bit disappointed with the noise when I looked at the shots at 100%. Also my manual focus could be better. (The focus scale on my lens is way off, other people online seem to also have this problem, but mine might be the result of dropping it on a rock on its first outing...)
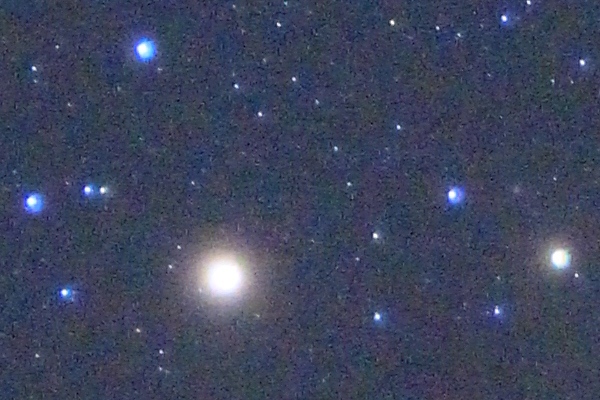
100% crop of original image
After a bit of internet research I worked out how to use the command line tools that come with Hugin to align and average a stack of images.
For simplicity copy the RAW files to process into a clean folder.
First I used Rawtherapee to convert the camera's CR2 (RAW) files into 16 bit tif files. I also did a little preprocessing including subtracting a dark field image. Save the profile so the same process can be used on each file.
Then all it takes is the following two commands to align and average the tif files.
$ align_image_stack -a IMG_*.tif
$ enfuse --exposure-weight=1 --saturation-weight=0  --exposure-mu=0.5 --exposure-sigma=1 IMG_*.tif*.tif
There were only four images in my stack so I'd only expect to reduce the noise by a half, but it definetly looked better.
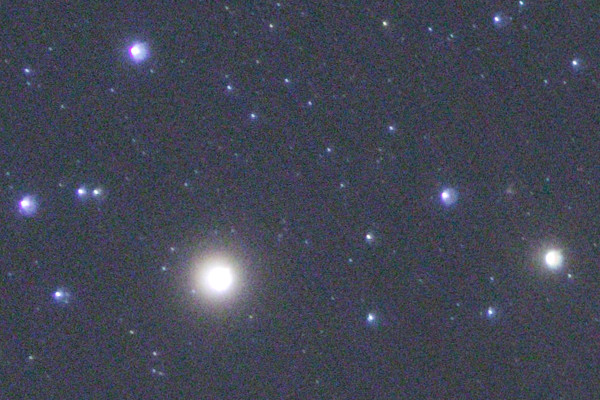
100% crop of stacked image
After that I played with the image a little in RT again getting the colour balance better and applying a little local contrast. (I didn't really know what I was doing so I just experimented)
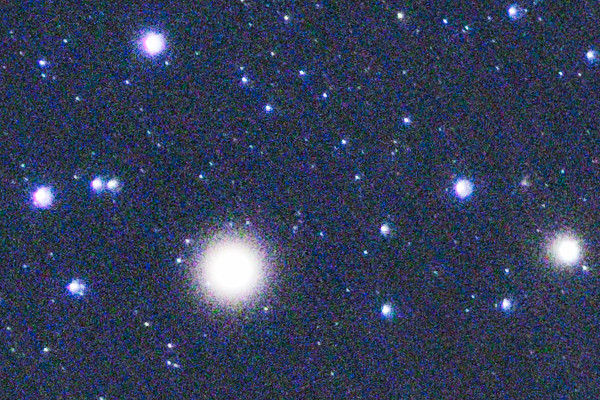
100% crop of final image
The align process takes care of the movement of the stars between each shot, but that blurs the foreground. I used GIMP to combine the landscape of a single image with the average star image. (see here for a basic tutorial). Ideally I should of taken a longer shot with a lower ISO for the landscape part. This would have given less noise. Also next time around I'll try a lower ISO and a longer shutter speed for the star shots, aiming for less noise at the expense of a little star trailing.
But I'm reasonably pleased with the final result for my first attempt but with heaps still to learn.