The next step on from all the Material Cats was to make a cat on my 3D printer (an Ultimaker original). This required a 3D model of the cat. Years ago I played around with a home built laser scanner using the software from this project (David laser scanner), but the model results required a lot of painstaking clean up and I moved on to something else. Also 3d scanning is a bit close to my day job to spend too much of my own time on it.
More recently I've seen lots of blog posts on making 3D models from large collections of photos as well as using devices based on Kinect sensor.
The most mentioned software for making a model from photos (photogrametry) is Autodesk's 123d Catch. I gave it a go using the plaster cat as a model and was really surprised at the quality of the mesh I got for the effort put in.
Basically you take a large number of photos of an object from all angles, then feed these into the software which analyses them. By matching points in the photos, the software determines where the camera was for each shot and what the 3D shape of the object is.
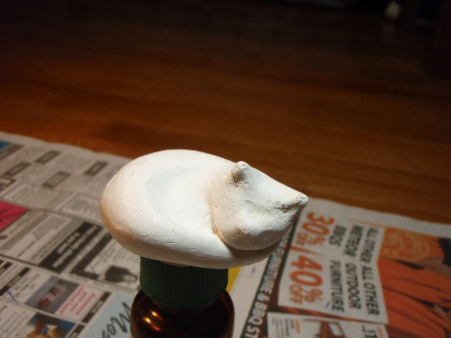
The first step is to take photos. Like a lot of photo shoots its best to put some effort in to getting this right as fixing bad photos always takes longer than taking good photos in the first place. These tips and these are a good place to start. I choose to take photos of the plaster model of the cat because it had an evenly coloured non reflective surface. I used some plasticine to stick it to the top of a bottle so I'd be able to get photos of the underside of the cat.
Some people use fancy rigs for the camera but I just used a mini-tripod and worked on the floor. I drew a circle on the newspaper and marked of 18 positions even divisions around the circle. For each photo I placed the front leg of the tripod on a division and took a photo. The newspaper gives lots of detail in each shot for the software to work out camera positions. I took photos at three heights, one level with the cat, one looking doen on it and one looking up. I used a couple of desk lamps to evenly light the model. I made sure each photo was taken with the same zoom level, but didn't take any precautions to fix the exposure or aperture. (I was using an Olympus mu 790).
This gave me 54 photos. Some of these photos were out of focus so I deleted them. This left me with 49 OK photos.
The autodesk web app requires google chrome on a windows machine. This was a nuisaance as I almost only run linux at home. But using a borrowed machine I used the web app to upload the photos. The instructions provided are pretty straight forward.
Upload the photos:

The model produced has the 3D mesh with the colours from the photos mapped onto the mesh.
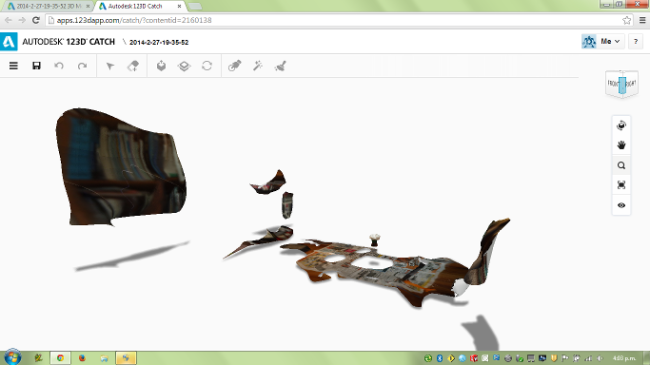
The 3D model produced includes the newspaper part of the bookcase and some of the couch. The cat sitting on its bottle is the very small white piece in the centre of the above screen capture.
I installed and played around with the autodesk tools for cleaning up the image, but found them a bit cumbersome to use. Instead I exported the model as a stl file and cleaned it up in Blender.
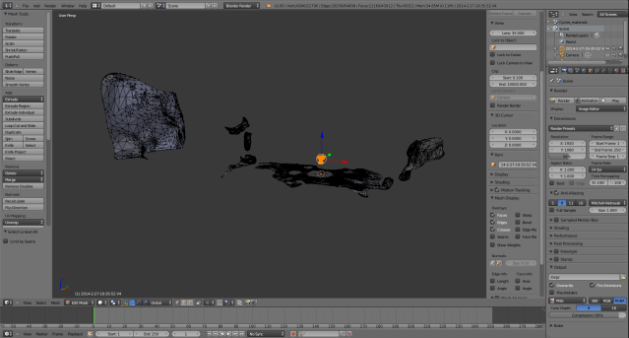
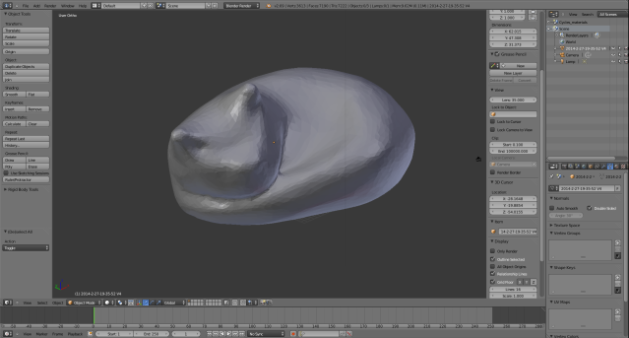
The model mesh imported into blender with the cat and support selected.
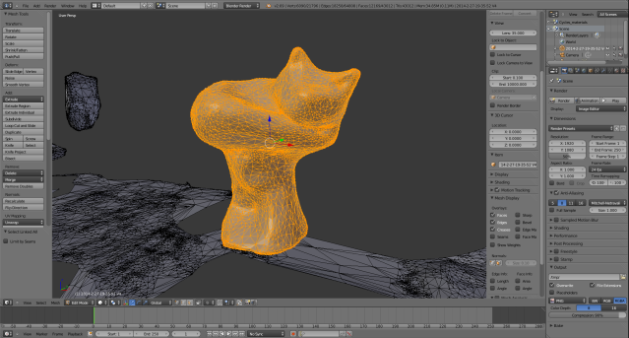
Everything but the cat and support deleted
First I deleted everything extra in the imported mesh.
I then used a boolean operation with a cube to remove the support from the cat and give it a flat base suitable for printing.
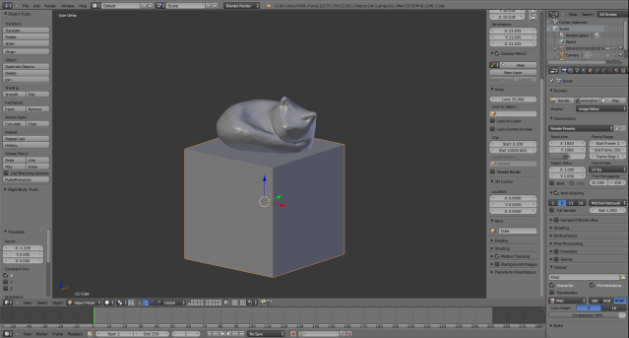
There were a few pimple shaped artifacts and a few dings which I cleaned up by deleting mesh triangles and then filling the gap. I also smoothed the mesh a bit and scaled it to match the original size.
To distinguish cats made from the digital model from the cats made from the silicon mould, I transformed the mesh to its mirror image.
Here's the final digital model and a set of three printed cats at 100%, 75% and 50% of original size. Making scale copies is so much easier in a digital process.
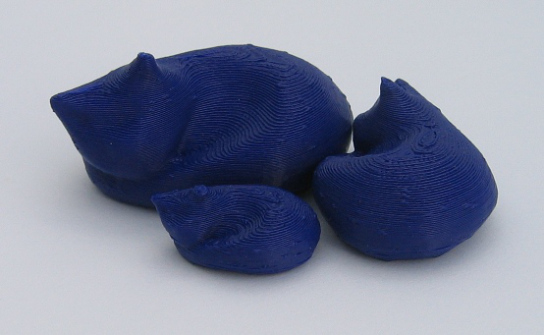
The printed cat is reasonably similar to the original, the indent above the tail is not nearly as deep or as sharp as the original. A concave indent in a object is harder for photogrametry to capture than the outside contour of the object.
Overall I was very pleased with how well the model turned out for the effort involved. Particularly how little clean up the mesh required.
Next I'd like to try the open source alternatives, particularly the python photogrametry toolbox