I had a friend who after some self-reflection decided his primary hobby wasn't wood work but was collecting wood working tools. This left him feeling much less guilty about the number of wood working planes he had in his shed.
If I was honest my major hobby or interest is collecting techniques for making things as much as actually making stuff. I've been to a lot of workshops and researched a lot of techniques on the web. A while back I started documenting some of these using the same cat mould for any technique that I possibly could.
Here's the collection so far:
The original cat is the grey and brown cat shown here. She was modeled in clay, burnished and saggar fired in an electric kiln.
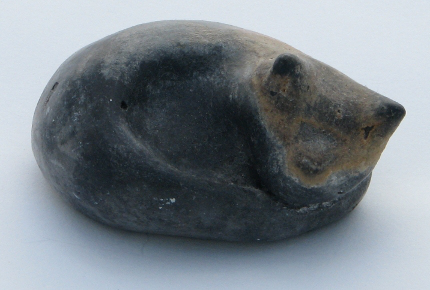
For a saggar firing the piece is placed inside a larger pot filled with sawdust, wood shavings and colourants such as copper sulphate and copper wire. The pot is sealed and fired in an electric kiln. This give a reducing atmosphere (not enough oxygen for clean burning). The colourants used in ceramics, produce different colours in a reducing atmosphere than they do in a normal electric kiln firing. The process produces a bit of smoke outside the kiln. The kiln I fired this in was in a garage on a school site so we got away with it. The kilns I use now are in a community arts facility inside a building and I can't do saggar firings there. I like the randomness of this type of process, the result isn't known until the piece is taken from the kiln. Pit firing and raku firing are other processes I enjoy for their random or serendipitous results.
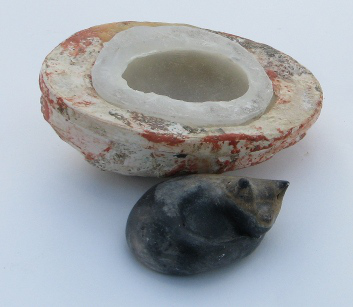
The mould is made in two parts. The inner part is flexible and is made with co-polymer sealant (the clear stuff you buy at the hardware store for sealing bathroom tiles). Professional mould makers use expensive (at least here in NZ) two-part silicon moulding compounds. Sealant is way cheaper and easier to get. The cons are its thick consistency make it easy to trap air against the mould, giving unsightly pimples on the casting. Also the sealant sets by releasing a gas, so thick layers can take a long time (or forever) to cure. Years ago I picked up a tip1 to add mineral turpentine to the sealant to thin it. This can then be painted on as a thin layer on to the object being cast. Allow this first thin layer to dry. It will take a lot longer than plain sealant due to the turps. When its dry build up the mould with more plain sealant filling in all the gaps until there are no undercuts. Let this dry again.
When the sealant is dry an outer "mother mould" of plaster is made to support the sealant inner mould.
I follow this post up with a cat photo and explanation for each material. There's bronze and aluminum, leather and paper mache as well as various plastics and ceramics. The next step is to produce a digital model to try with different digital fabrication (3d printing, laser cutting layers, milling?...) processes.
-
I got this tip on thinning the sealant with turps, years ago from the blog of a trans-gender engineer who was experimenting with cheap ways to make falsies. The blog was a fascinating mix of their work on the west coast of the US, their experiments with mould making and their trips to Las Vegas to test the latest version. ↩